Repainting a vehicle is an intricate process that often requires precision and care, especially when it comes to deep paint scratches. These imperfections not only detract from the aesthetic appeal of a car but can also lead to more significant issues, such as rust and corrosion if left unaddressed. Understanding the nuances of deep scratch repair is crucial for any automotive enthusiast or owner who wishes to maintain the integrity of their vehicle’s finish.
In this article, we will delve into professional techniques that can effectively restore your vehicle’s surface to its original luster. With the right tools and knowledge, even the deepest scratches can be treated, ensuring that your car remains in optimal condition. From assessing the damage to executing proper repair procedures, mastering these techniques will not only enhance the appearance of your vehicle but also prolong its lifespan.
Whether you’re a DIY enthusiast or a professional in the automotive industry, honing your skills in deep scratch repair is essential. The subsequent sections will guide you through the materials needed, step-by-step processes, and tips for achieving a flawless finish. Let’s transform those unsightly scratches into a distant memory.
Assessing the Depth and Damage of Scratches Before Repairing
Before embarking on the repair of deep paint scratches, it is essential to accurately assess both the depth and extent of the damage. This initial evaluation determines the appropriate repair method and the materials required for a successful outcome.
Start by visually inspecting the scratch under good lighting conditions. Look for discoloration or variations in texture surrounding the scratch, which may indicate whether the damage is limited to the clear coat, base coat, or extends to the primer or metal layers underneath. Use your fingernail to gently run over the scratch; if you can feel a significant groove, the damage likely penetrates deeper than the clear coat.
Next, classify the scratch based on its depth. Superficial scratches usually only affect the clear coat layer, while deeper scratches may reach the base coat or primer. If the scratch has removed paint entirely, it is important to note the exposed material, as bare metal can corrode if not repaired promptly. Use a magnifying glass for a closer look to assess how much of the paint has been compromised.
Document any paint or rust damage that may accompany the scratch. For instance, rust formation indicates that the scratch has breached multiple protective layers. If rust is present, it must be addressed during the repair process to prevent further deterioration.
Finally, consider the location of the scratch when determining the repair method. Scratches located on highly visible areas may require more meticulous repair techniques compared to those in less noticeable spots. By thoroughly assessing the depth and damage of each scratch, you can ensure an efficient repair process tailored to the specific needs of the affected area.
Step-by-Step Guide to Filling and Sanding Deep Scratches

Repairing deep paint scratches involves a precise process to ensure a smooth finish and restore your vehicle’s appearance. Follow these steps to effectively fill and sand deep scratches.
Step 1: Gather the Required Materials
Before starting, collect the necessary tools and materials: automotive touch-up paint, sanding blocks (various grits), a clean microfiber cloth, primer, clear coat, paint applicator, and safety equipment such as gloves and goggles.
Step 2: Clean the Area
Thoroughly wash the scratched area with soap and water to remove dirt and grime. Dry it completely with a microfiber cloth to prevent any moisture from interfering with the repair process.
Step 3: Assess the Scratch
Examine the scratch to determine its depth. If the scratch has penetrated to the metal, you may need to apply a primer before adding paint, while shallower scratches may only require touch-up paint.
Step 4: Sand the Scratch
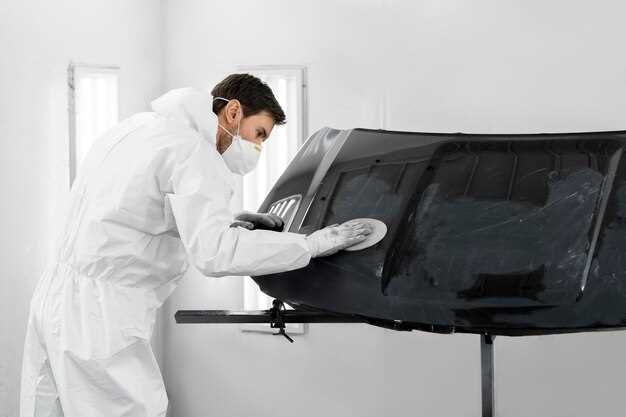
Using a sanding block with fine-grit sandpaper (around 800-1000 grit), gently sand the scratched area. This process helps smooth out the edges of the scratch and prepares the surface for filling. Be careful not to sand too aggressively to avoid damaging surrounding paint.
Step 5: Clean the Sanded Area
After sanding, wipe the area with a clean microfiber cloth to remove any dust and debris. This ensures that the filling material adheres properly.
Step 6: Apply Primer (if necessary)
If the scratch is deep and has exposed bare metal, apply a thin layer of automotive primer to the affected area. Allow it to dry according to the manufacturer’s instructions. This step is crucial for preventing rust and ensuring proper paint adhesion.
Step 7: Fill the Scratch
Using a paint applicator, apply touch-up paint to the scratch. Fill the scratch slightly above the surface to allow for sanding down. Allow the paint to dry completely as per the product guidelines.
Step 8: Sand the Filled Area
Once the paint has dried, use a sanding block with a finer grit (around 1200-1500 grit) to gradually sand the filled area until it is level with the surrounding paint. Keep the sanding light and controlled to avoid removing too much paint.
Step 9: Polish the Area
After achieving a smooth surface, polish the area with a suitable automotive polish to restore gloss and blend it with the surrounding finish. Apply the polish using a foam applicator and buff it to a shine with a clean microfiber cloth.
Step 10: Apply Clear Coat
Finally, apply a clear coat over the repaired area to protect the paint and add additional shine. Make sure to follow the instructions for drying times and application techniques ensuring full protection of the repair.
By carefully following these steps, you can effectively fill and sand deep scratches, restoring your vehicle’s paintwork to its original condition.
Finishing Techniques for a Seamless Paint Repair

Achieving a seamless paint repair requires careful attention to finishing techniques that blend the repaired area with the surrounding paint. One of the first steps is to use fine-grit sandpaper, typically in the range of 1500 to 2000 grit, to smooth the edges around the repaired scratch. This helps to eliminate any roughness and feather the paint edges, allowing for a more uniform surface.
After sanding, it is crucial to clean the area thoroughly to remove any dust or debris, which can affect paint adhesion. A microfiber cloth and a suitable cleaning solvent can be used to ensure the surface is pristine before applying any new paint.
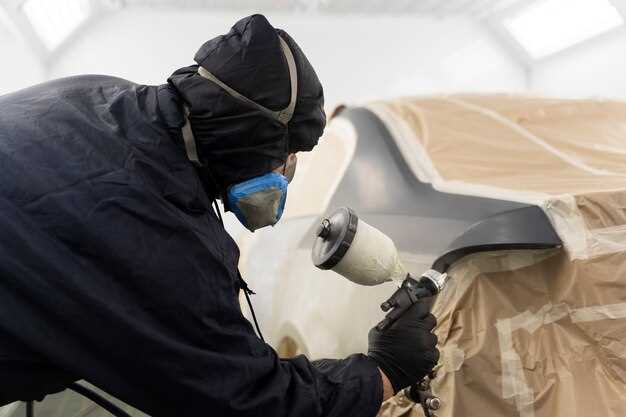
For the actual painting process, it is advisable to use a small brush or airbrush for precision. This allows for better control when applying paint in the repaired area, ensuring it blends seamlessly with the original finish. If using spray paint, hold the can at a consistent distance and apply light coats, gradually building up the coverage to avoid runs and drips.
Once the paint has dried completely, the area should be evaluated for smoothness. If necessary, a finer grit sandpaper can be used lightly over the repaired area to achieve a flawless finish. Following this, polishing compound can be applied with a soft cloth to restore the shine and further blend the repair with the surrounding paint surface.
Finally, apply a clear coat to protect the repair and enhance its durability. This additional layer not only provides a consistent gloss level across the entire surface but also ensures long-term protection against UV damage and environmental factors. Allow the clear coat to cure fully as per the manufacturer’s recommendations to achieve optimal results and ensure a professional look.

