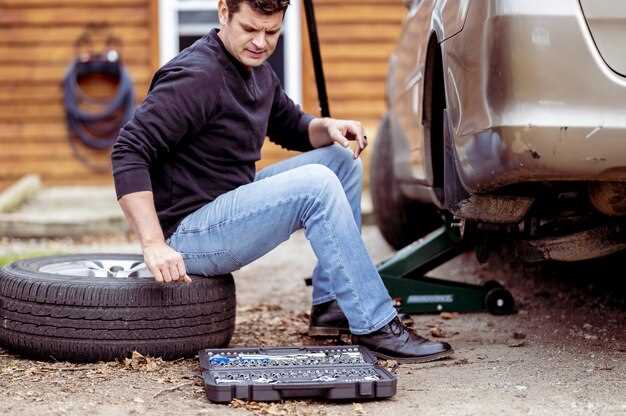
When it comes to vehicle aesthetics and protection, fenders and side skirts play a vital role. They not only enhance the overall appearance of your car but also shield critical components from dirt, debris, and potential damage. Over time, however, these elements can become loose due to various factors such as wear and tear, road conditions, or improper installation. Addressing a loose fender or side skirt promptly is crucial to maintaining both the look and functionality of your vehicle.
This guide will provide you with a step-by-step approach to securely reattach a loose fender or side skirt, ensuring that your vehicle remains both stylish and well-protected. Whether you’re a seasoned DIY enthusiast or a beginner looking to improve your automotive skills, this process can be accomplished with minimal tools and time.
Before diving into the reattachment process, it’s essential to gather the necessary materials and tools. Familiarizing yourself with the parts involved and understanding the installation points will make the task more manageable. By following this guide, you can restore your vehicle’s appearance and integrity, boosting its longevity on the road. Let’s get started on securing that loose fender or side skirt!
Identifying the Cause of the Loose Fender or Side Skirt
To effectively reattach a loose fender or side skirt, it is crucial to first identify the underlying cause of the issue. Various factors can contribute to the detachment of these components, and recognizing them can facilitate a more efficient repair.
One common reason for a loose fender is environmental damage. Continuous exposure to harsh weather conditions, such as rain, snow, or intense sunlight, can weaken the adhesive material or fasteners holding the fender in place. This deterioration can lead to gaps or looseness over time.
Another factor is physical impact. Accidental bumping during parking, hitting a curb, or minor collisions can dislodge the fender or side skirt. Inspecting for signs of physical damage, such as scrapes or dents, can help determine if impact is the root cause.
Wear and tear from regular use is also significant. Over time, bolts, screws, and clips may become loose due to vibrations from driving. It is essential to check the integrity of these fasteners to ensure they are securely attached and have not corroded or broken.
Additionally, improper installation at the time of mounting can contribute to future looseness. If the fender or skirt was not affixed correctly initially, the likelihood of its becoming loose increases. Reviewing the original installation process can provide insights into potential shortcomings.
Lastly, modifications or aftermarket parts may not align perfectly with factory specifications, resulting in an unstable fit. If modifications have been made, assessing their compatibility with the existing parts is necessary to identify any installation issues.
In summary, diagnosing the cause of a loose fender or side skirt involves examining environmental factors, physical impact, wear and tear, installation quality, and compatibility of modified parts. Understanding these causes aids in addressing the problem effectively and ensures a secure reattachment process.
Tools and Materials Required for Reattachment

To successfully reattach a loose fender or side skirt, you will need a selection of tools and materials. Having the right items on hand will ensure that the process is efficient and effective.
First, gather basic hand tools. A socket wrench set or a screw driver set with various head types is essential for removing and tightening bolts and screws. Depending on your vehicle, you may require specific sizes, such as metric or standard measurements.
A torque wrench is also important to apply the correct amount of pressure when reinstalling bolts. This helps prevent damage to the fender or side skirt and ensures secure attachment. Additionally, pliers can assist in gripping and manipulating small parts or clips.
Prepare adhesive materials, depending on the method of reattachment. Auto-grade double-sided tape or adhesive sealant can provide extra hold for fenders and side skirts that require a more secure bond. Make sure to choose options suited for automotive use, which can withstand various weather conditions.
Don’t forget to have cleaning supplies ready. Rubbing alcohol or a degreaser will help remove old adhesive residues and prepare surfaces for optimal adhesion. A soft cloth or paper towel can be useful for applying cleaning agents.
A set of replacement clips or fasteners may be necessary if old ones are damaged or missing. Check your vehicle’s specifications to ensure compatibility with your fender or side skirt.
Lastly, wear safety gear such as gloves and goggles to protect yourself during the process. This ensures safety while handling tools and materials, especially when working on potentially sharp edges or small parts.
Step-by-Step Instructions for Securely Attaching the Fender or Side Skirt

To begin the process of securely reattaching a loose fender or side skirt, gather the necessary tools: a socket wrench, screws or clips specific to your vehicle’s make, a flathead and Phillips screwdriver, and optionally, double-sided tape or adhesive for additional security.
Start by lifting the vehicle with a jack to ensure easy access to the fender or side skirt. Once elevated, ensure that the car is stable by using jack stands for added safety.
Inspect the area where the fender or side skirt will be attached. Remove any rust, dirt, or debris that may impede the attachment. A clean surface ensures a stronger hold.
If any clips or screws were displaced when the fender or skirt became loose, locate them and assess their condition. Replace any damaged components with new ones that are compatible with your vehicle model.
Align the fender or side skirt with the vehicle body carefully. Ensure that all holes line up properly with the clips or screw holes on the car. This is crucial for a secure fit.
Begin fastening the fender or side skirt starting from one end. Use your socket wrench or screwdriver to insert screws or fasten clips. Start loosely to allow adjustments, and progressively tighten each attachment point. This helps maintain an even alignment.
Once all screws and clips are in place, go back and tighten each one securely. Be cautious not to overtighten, as this may lead to cracking or damaging the fender or skirt.
If using adhesive or double-sided tape for added reinforcement, apply it to the contact points between the fender or side skirt and the vehicle. Ensure the adhesive is rated for automotive use and follow the manufacturer’s instructions for optimal results.
Finally, lower the vehicle back to the ground and visually inspect the fender or side skirt to ensure a flush fit with the vehicle body. Take it for a short drive to verify that everything is secure and make any necessary adjustments if you notice any loose areas again.

