Painting a vehicle is not just about aesthetics; it plays a crucial role in preserving the condition and value of the automobile. The auto painting process involves several meticulous steps that require precision, skill, and the right materials to achieve a professional finish. Whether you’re a DIY enthusiast or planning to take your car to a specialist, understanding the process will help you make informed decisions.
In this comprehensive guide, we will explore the various stages of auto painting, from preparation to the final inspection. Each phase is vital to ensure that the paint adheres properly and lasts for years. We will go into detail on the tools and products needed, the importance of surface preparation, and the specific techniques used for different types of paint applications.
Furthermore, we will address common challenges and mistakes to avoid during the painting process. By the end of this guide, you will have a thorough understanding of the auto painting process, empowering you to either tackle the project yourself or collaborate effectively with professionals. Let’s dive into the world of auto painting and unlock the secrets to achieving a flawless finish.
Choosing the Right Paint Products for Your Vehicle
Selecting the appropriate paint products for your vehicle is critical for achieving a long-lasting, high-quality finish. Understanding the different types of automotive paints and their specific applications will guide you in making informed choices.
First, consider the type of paint. There are primarily three categories: acrylic enamel, urethane, and lacquer. Acrylic enamel is known for its durability and ease of application. It dries quickly and provides a glossy finish, making it suitable for beginners. Urethane paints, on the other hand, offer superior durability and resistance to chemicals and UV rays. They require a hardener for application and are recommended for professional use due to their complexity. Lacquer, while easy to apply, is less durable and deteriorates faster under sunlight, making it less favorable for long-term applications.
Next, think about the finish you desire. Paints are available in various finishes, including gloss, satin, and matte. Gloss finishes reflect light effectively, enhancing the depth of color, while satin finishes provide a softer look, and matte finishes offer a unique, understated appearance. Your choice should align with your personal taste and the overall aesthetic of your vehicle.
Color selection is crucial as well. Whether opting for a factory color or a custom shade, ensure that the paint products are compatible with each other. Using a base coat and clear coat system can enhance the color’s vibrancy and protect it from environmental damage. Always check for color matching capabilities if you’re repairing or repainting sections of the vehicle.
It’s also important to consider the conditions in which you will be painting. Some paints work better in specific climates. For instance, certain paints cure faster in warmer temperatures, while others may require higher humidity levels for optimal results. Always read the manufacturer’s specifications and recommendations.
Lastly, don’t overlook the importance of primers and clear coats. Primers prepare the surface and improve adhesion, while clear coats provide a protective layer that adds gloss and depth to the paint. Choose quality products to achieve the best results.
In conclusion, selecting the right paint products involves considering the type of paint, desired finish, color compatibility, environmental conditions, and the use of primers and clear coats. Making informed choices on these factors will ensure a professional-looking, long-lasting finish for your vehicle.
Step-by-Step Preparation and Surface Sanding Techniques

The preparation phase is crucial for achieving a flawless auto painting result. Proper surface sanding is essential to create a smooth base, ensuring that the paint adheres properly and provides a professional finish. Follow these steps to prepare your vehicle effectively.
Begin by washing the vehicle thoroughly with soap and water to remove dirt and grime. It is imperative to work on a clean surface to avoid trapping contaminants under the paint. After washing, dry the surface using a lint-free cloth.
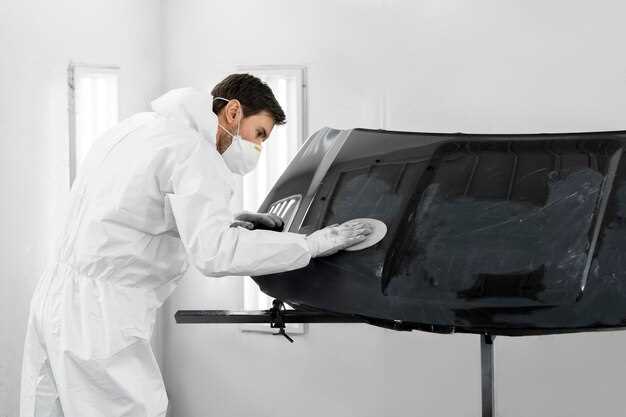
Inspect the surface for any imperfections, such as scratches, dents, or rust spots. Use a body filler to repair any significant flaws. Once the filler is dry, sand down the repaired areas with a sanding block or electric sander to ensure they are level with the surrounding surface.
Now, select the appropriate sanding grit to start the process. For initial sanding, use a coarse grit sandpaper (around 80-120 grit) to remove old paint and prepare the surface. Sand in a consistent, even manner, using circular or linear motions. Avoid applying excessive pressure as it may damage the underlying material.
After the initial sanding, switch to a finer grit sandpaper (around 220 grit) to refine the surface further. This step smooths out any rough patches and prepares the vehicle for primer application. Continue sanding until the surface feels smooth to the touch.
Next, wipe down the vehicle with a clean, damp cloth to remove any sanding dust. This prevents contamination during the painting process. Additionally, a tack cloth can be used for an even more thorough clean, picking up any remaining particles.
Once the surface is free from dust, apply a primer specific to the type of paint you will be using. Primer acts as a bonding agent and seals the surface, enhancing paint adhesion. Allow the primer to cure according to manufacturer instructions before proceeding to the next steps in the painting process.
In summary, meticulous preparation and proper sanding techniques are essential to achieve an exceptional auto paint job. By following these steps, you set a solid foundation for a high-quality finish that enhances the appearance and durability of your vehicle’s paint.
Finishing Touches: Application, Curing, and Polishing

After the priming and painting processes are completed, the finishing touches play a crucial role in achieving a professional-quality finish for your automotive project. This section covers the key steps involved in application, curing, and polishing of the paint, ensuring the best result for your vehicle.
Application
The application process significantly impacts the final appearance of the paint job. Follow these guidelines for optimal results:
- Timing: Apply the paint in the appropriate temperature and humidity levels. Ideal conditions are generally between 70°F to 85°F (21°C to 29°C) with low humidity.
- Technique: Use smooth, even strokes when applying paint. Overlap each pass slightly to avoid uneven coverage.
- Layering: Apply multiple thin coats rather than one thick coat. This helps prevent drips, runs, and uneven drying.
- Tools: Choose the right equipment, such as a spray gun for a finer mist, or utilize a roller for large, flat surfaces.
Curing
Curing is the process that allows paint to harden and bond effectively to the vehicle’s surface. Proper curing ensures durability and longevity of the paint job. Consider the following:
- Drying Time: Allow adequate drying time between coats as specified by the manufacturer. This may range from 30 minutes to several hours.
- Full Cure: Understand that full curing can take several days, depending on the type of paint used. Always refer to the paint manufacturer’s guidelines.
- Heat Application: Some paints benefit from heat to cure, such as infrared lamps or heat guns, but use with caution to avoid damaging the paint.
Polishing
Polishing is the final step to enhance the gloss and smoothness of the paint job. It can significantly improve the overall appearance of the finish:
- Choose the Right Product: Use a quality polishing compound specifically designed for automotive paint.
- Application: Apply the polish using a soft foam pad or microfiber cloth. Employ circular motions to help the compound work effectively.
- Pressure: Use light to moderate pressure while polishing. Excessive pressure could damage the paint or create swirls.
- Follow-Up: After polishing, always follow up with a wax or sealant to protect the finish and enhance the shine.
By carefully executing the application, allowing proper curing, and performing thorough polishing, you ensure that your automotive paint job not only looks great but stands the test of time.

